标签 python 下的文章

请输入图片描述

前面展示了一个简单的面向对象的图书馆应用,定义了Library,Book两个类,缺少用户的管理,比如默认只有一个用户借书、还书
对于正常实际的图书馆应用比如涉及多个用户使用借书、还书的功能,这里我们就在前面程序的基础上增加用户管理的功能 - 简单的用户注册

这个程序首先新增加了一个类定义User

class User:
    def __init__(self, username, password):
        self.username = username
        self.password = password
        self.borrowed_books = []

    def borrow_book(self, book):
        if not book.is_checked_out:
            book.check_out()
            self.borrowed_books.append(book)
            print(f"{self.username} has borrowed '{book.title}'.")
        else:
            print("Sorry, the book is already checked out.")

    def return_book(self, book):
        if book in self.borrowed_books:
            book.check_in()
            self.borrowed_books.remove(book)
            print(f"{self.username} has returned '{book.title}'.")
        else:
            print("This book is not borrowed by the user.")

User类包含用户基本信息,同时也维护所借阅book的信息

Library类内部需要增加一些数据定义,维护用户的信息

def __init__(self):
        self.books = []
        self.users = []

使用一个list保存注册到Library的用户

完整的演示

class User:
        def __init__(self, username, password):
            self.username = username
            self.password = password
            self.borrowed_books = []
    
        def borrow_book(self, book):
            if not book.is_checked_out:
                book.check_out()
                self.borrowed_books.append(book)
                print(f"{self.username} has borrowed '{book.title}'.")
            else:
                print("Sorry, the book is already checked out.")
    
        def return_book(self, book):
            if book in self.borrowed_books:
                book.check_in()
                self.borrowed_books.remove(book)
                print(f"{self.username} has returned '{book.title}'.")
            else:
                print("This book is not borrowed by the user.")
    
    class Library:
        def __init__(self):
            self.books = []
            self.users = []
    
        def add_book(self, book):
            self.books.append(book)
    
        def add_user(self, user):
            self.users.append(user)
    
        def list_books(self):
            print("Library Catalog:")
            for book in self.books:
                book.display_info()
    
        def search_book_by_name(self, book_name):
            for book in self.books:
                if book.title == book_name:
                    return book
            return None
    
        def check_book_status(self, book_name):
            book = self.search_book_by_name(book_name)
            if book:
                if book.is_checked_out:
                    print(f"The book '{book_name}' is checked out.")
                else:
                    print(f"The book '{book_name}' is available.")
            else:
                print(f"The book '{book_name}' is not found in the library.")
    
        def user_login(self, username, password):
            for user in self.users:
                if user.username == username and user.password == password:
                    return user
            return None
    
    # 创建图书馆对象
    library = Library()
    
    # 将图书加入图书馆
    library.add_book(Book("The Great Gatsby", "F. Scott Fitzgerald"))
    library.add_book(Book("To Kill a Mockingbird", "Harper Lee"))
    library.add_book(Book("1984", "George Orwell"))
    
    # 注册用户
    user1 = User("user1", "password1")
    user2 = User("user2", "password2")
    
    # 将用户加入图书馆
    library.add_user(user1)
    library.add_user(user2)
    
    # 用户登录
    logged_in_user = library.user_login("user1", "password1")
    
    if logged_in_user:
        # 用户借书
        library.check_book_status("The Great Gatsby")
        logged_in_user.borrow_book(library.search_book_by_name("The Great Gatsby"))
    
        # 用户还书
        logged_in_user.return_book(library.search_book_by_name("The Great Gatsby"))
    
        # 再次查询书籍状态
        library.check_book_status("The Great Gatsby")
    else:
        print("Login failed. Invalid username or password.")

R-C.png

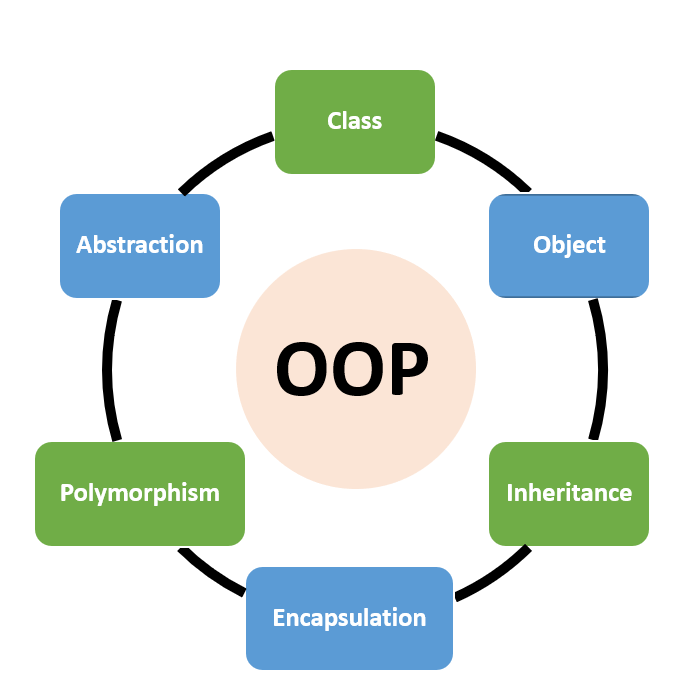
当涉及到面向对象编程(Object-Oriented Programming,OOP)时,Python是一种非常强大且灵活的编程语言。在Python中,一切皆对象,你可以使用类(class)和对象(object)来实现面向对象的编程范例。这使得代码更加模块化、可重用,并且更易于理解。

下面是一个简单的Python面向对象编程入门指南:

1. 类和对象

类是一个定义了对象的结构和行为的蓝图,而对象则是类的实例化。类是创建对象的模板,包含了属性(成员变量)和方法(成员函数)。可以使用关键字class来创建类。

class MyClass:
    def __init__(self, name):
        self.name = name

    def greet(self):
        return f"Hello, {self.name}!"

2. 构造函数和实例化

在上面的例子中,__init__是一个特殊的方法,称为构造函数(Constructor)。它在创建对象时自动调用,并用于初始化对象的属性。self参数表示类的实例本身。

实例化一个类意味着创建类的一个具体对象,这可以通过以下方式完成:

obj = MyClass("John")

3. 成员变量和成员函数

成员变量是类中存储数据的属性,可以通过self.variable_name来定义和访问它们。成员函数是类中定义的方法,可以访问和操作成员变量,也可以执行其他操作。

class MyClass:
    def __init__(self, name):
        self.name = name

    def greet(self):
        return f"Hello, {self.name}!"

    def set_name(self, new_name):
        self.name = new_name

4. 继承

继承是OOP中的一个重要概念,允许你创建一个新类(子类),并从现有类(父类)继承属性和方法。子类可以覆盖父类的方法或添加新的方法。

class ChildClass(MyClass):
    def __init__(self, name, age):
        super().__init__(name)
        self.age = age

    def greet(self):
        return f"Hello, {self.name}! You are {self.age} years old."

5. 多态

多态性允许不同类的对象对相同的方法进行调用,但是根据对象的类型,方法的实现可能会有所不同。这增加了灵活性和可扩展性。
举例说明一下多态:
当涉及到多态时,我们通常会利用继承和方法重写的特性。多态允许不同类的对象对相同的方法进行调用,但是根据对象的类型,方法的实现可能会有所不同。这增加了代码的灵活性,使得我们可以在运行时选择调用哪个类的方法。

让我们通过一个简单的例子来说明多态:

假设我们有一个动物类 Animal,它有一个 speak 方法,用于返回该动物的叫声。然后我们有两个子类 Dog 和 Cat,它们分别继承自 Animal 类,并且都重写了 speak 方法。

class Animal:

def speak(self):
    return "Unknown animal sound."

class Dog(Animal):

def speak(self):
    return "Woof!"

class Cat(Animal):

def speak(self):
    return "Meow!"

在我们可以创建 Dog 和 Cat 的对象,并调用它们的 speak 方法:

dog = Dog()
cat = Cat()

print(dog.speak()) # 输出: "Woof!"
print(cat.speak()) # 输出: "Meow!"

在这个例子中,我们使用多态来实现了不同类型的动物有不同的叫声。虽然我们调用了相同的 speak 方法,但由于对象的类型不同,它们的实现也不同。这就是多态的效果。

多态性还可以在更复杂的场景中发挥作用,比如创建一个函数,该函数接受 Animal 类的对象作为参数,并调用它们的 speak 方法:

def animal_sound(animal):

return animal.speak()

使用多态调用不同对象的 speak 方法

print(animal_sound(dog)) # 输出: "Woof!"
print(animal_sound(cat)) # 输出: "Meow!"

通过这种方式,我们可以根据传递给 animal_sound 函数的实际对象来调用不同类的方法,而无需显式地编写多个条件判断语句。这提高了代码的可读性和可维护性。

6. 封装

封装是OOP中的另一个重要概念,它意味着将数据和代码(方法)包装在一个单独的单位中,对外部隐藏内部的实现细节。这可以通过使用私有成员变量和方法来实现,例如在成员变量前加上双下划线__。
举例详细说明一下封装的概念

封装是面向对象编程中的一个重要概念,它指的是将数据(成员变量)和代码(成员函数)包装在一个单独的单位中,并对外部隐藏内部的实现细节。封装使得对象的内部实现对外部是不可见的,只有通过公共接口(成员函数)才能与对象进行交互。这样可以保护数据的完整性,避免直接访问和修改对象的内部状态,从而降低了代码的耦合性,提高了代码的安全性和可维护性。

在Python中,封装通过使用访问控制修饰符来实现,这些修饰符是命名约定,而不是强制性的。Python有三种类型的访问控制修饰符:

公有访问修饰符:成员变量和成员函数默认为公有,可以在类的内部和外部进行访问。

受保护的访问修饰符:在成员变量或成员函数名前加上一个下划线 _,表示这些成员在类的内部和子类中可以访问,但在类的外部不应直接访问。

私有访问修饰符:在成员变量或成员函数名前加上两个下划线 __,表示这些成员只能在类的内部访问,对于类的外部是不可见的。

让我们通过一个简单的示例来说明封装的概念:

class Car:
    def __init__(self, make, model, year):
        self.make = make  # 公有变量
        self.model = model  # 公有变量
        self.__year = year  # 私有变量

    def start_engine(self):
        return "Engine started!"

    def __display_year(self):  # 私有方法
        return f"Manufactured in {self.__year}"

    def get_year(self):  # 公有方法,用于获取私有变量的值
        return self.__display_year()


car = Car("Toyota", "Camry", 2022)

print(car.make)  # 输出: "Toyota"
print(car.start_engine())  # 输出: "Engine started!"

# 下面这两行代码会导致错误,因为 __year 是私有变量
# print(car.__year)
# print(car.__display_year())

# 使用公有方法获取私有变量的值
print(car.get_year())  # 输出: "Manufactured in 2022"

在上面的示例中,我们定义了一个 Car 类,其中包含一个公有变量 make、model,和一个私有变量 __year。我们还定义了一个公有方法 get_year(),用于获取私有变量 __year 的值。通过这种方式,我们实现了封装,隐藏了 __year 变量的实现细节,同时还提供了一个公共接口来访问和获取这个私有变量的值。

总结来说,封装是面向对象编程的一种核心原则,它通过访问控制修饰符来隐藏对象的内部实现细节,提高代码的安全性和可维护性,同时也提供了一个公共接口,通过该接口来与对象进行交互。这样可以有效地隔离和组织代码,让代码更易于理解和维护。

7. 访问控制

Python没有严格的访问控制机制,但通过命名约定来实现对类成员的访问限制。以单下划线开头的成员被认为是受保护的,应该避免直接访问,而以双下划线开头的成员是私有的,外部无法直接访问。
举例详细解释一下访问控制概念

访问控制是面向对象编程中用于限制类成员(成员变量和成员函数)访问权限的机制。在Python中,访问控制是通过访问控制修饰符实现的,这些修饰符是命名约定,不是强制性的。

Python中有三种类型的访问控制修饰符:

公有访问修饰符:成员变量和成员函数默认为公有,在类的内部和外部都可以进行访问。

受保护的访问修饰符:在成员变量或成员函数名前加上一个下划线 _,表示这些成员在类的内部和子类中可以访问,但在类的外部不应直接访问。虽然在语法上是可以访问的,但是通常认为这些成员不应该被外部直接访问。

私有访问修饰符:在成员变量或成员函数名前加上两个下划线 __,表示这些成员只能在类的内部访问,对于类的外部是不可见的。外部无法直接访问私有成员,但在类的内部是可以访问的。

让我们通过一个示例来解释访问控制的细节:

class MyClass:
    def __init__(self):
        self.public_var = "This is a public variable."
        self._protected_var = "This is a protected variable."
        self.__private_var = "This is a private variable."

    def public_method(self):
        return "This is a public method."

    def _protected_method(self):
        return "This is a protected method."

    def __private_method(self):
        return "This is a private method."

变量和成员函数:

public_var 和 public_method 是公有的,可以在类的内部和外部直接访问。

_protected_var 和 _protected_method 是受保护的,在类的内部和子类中可以访问,但在类的外部也可以直接访问。但是通常不建议在类的外部直接访问受保护的成员。

__private_var 和 __private_method 是私有的,只能在类的内部访问,对于类的外部是不可见的。

现在,我们来测试一下是否能够直接访问这些成员:

obj = MyClass()

# 访问公有成员
print(obj.public_var)        # 输出: "This is a public variable."
print(obj.public_method())   # 输出: "This is a public method."

# 访问受保护成员(不建议这样做,但是语法上是可以的)
print(obj._protected_var)    # 输出: "This is a protected variable."
print(obj._protected_method())  # 输出: "This is a protected method."

# 下面这两行代码会导致错误,因为 __private_var 和 __private_method 是私有成员
# print(obj.__private_var)
# print(obj.__private_method)

虽然在Python中语法上是可以直接访问受保护的成员和私有成员的,但是通常建议遵循访问控制的原则,不要在类的外部直接访问受保护和私有成员。应该使用类提供的公共接口(公有方法)来访问和操作类的成员,这样可以更好地控制访问权限,提高代码的安全性和可维护性。
这是一个简单的面向对象编程入门指南。掌握这些基本概念将使你能够更好地利用Python的面向对象编程特性,创建复杂且结构良好的程序。

截图 2023-07-19 20-16-47.png

复习一下Python面向对象编程,构建一个简单的ATM类,实现ATM自助取款机的模拟
这是一组渐进式的练习,从最简单的ATM类,到持久性数据保存,构成一系列适合初学者的练习
ATM - Automatic Trasaction Machine
简化模拟,只需要实现下面的一些功能:
1. 登录功能(这里简化,不需要实现)
2. 创建账户
3. 存钱
4. 取钱
5. 退出

第一个版本atm_v1.py

构建基本的ATM类,包含几个方法,初始化一个ATM实例,调用其方法

最主要的功能有存储账户信息、存钱、取钱; 账户信息使用Python 字典数据类型
class ATM:
    def __init__(self):
        self.accounts = {}  # 用于存储账户信息的字典

    def create_account(self, account_number, initial_balance):
        if account_number not in self.accounts:
            self.accounts[account_number] = initial_balance
            print(f"账户 {account_number} 创建成功,初始余额为 {initial_balance} 元。")
        else:
            print("该账户已存在。")

    def check_balance(self, account_number):
        if account_number in self.accounts:
            return self.accounts[account_number]
        else:
            print("该账户不存在。")
            return None

    def deposit(self, account_number, amount):
        if account_number in self.accounts:
            self.accounts[account_number] += amount
            print(f"向账户 {account_number} 存入 {amount} 元。当前余额为 {self.accounts[account_number]} 元。")
        else:
            print("该账户不存在。")

    def withdraw(self, account_number, amount):
        if account_number in self.accounts:
            if self.accounts[account_number] >= amount:
                self.accounts[account_number] -= amount
                print(f"从账户 {account_number} 取出 {amount} 元。当前余额为 {self.accounts[account_number]} 元。")
            else:
                print("余额不足,无法完成取款。")
        else:
            print("该账户不存在。")

# 测试ATM类
atm = ATM()
atm.create_account("123456789", 1000)
atm.deposit("123456789", 500)
atm.withdraw("123456789", 200)
print(atm.check_balance("123456789"))

第二个版本atm_v2.py

增加菜单,初始化ATM实例,一直运行,直到用户退出菜单,这个比较符合正常使用场景
增加几个方法:一个run方法让ATM一直执行,show_menu菜单

class ATM:
    def __init__(self):
        self.accounts = {}

    def create_account(self, account_number, initial_balance):
        if account_number not in self.accounts:
            self.accounts[account_number] = initial_balance
            print(f"账户 {account_number} 创建成功,初始余额为 {initial_balance} 元。")
        else:
            print("该账户已存在。")

    def check_balance(self, account_number):
        if account_number in self.accounts:
            return self.accounts[account_number]
        else:
            print("该账户不存在。")
            return None

    def deposit(self, account_number, amount):
        if account_number in self.accounts:
            self.accounts[account_number] += amount
            print(f"向账户 {account_number} 存入 {amount} 元。当前余额为 {self.accounts[account_number]} 元。")
        else:
            print("该账户不存在。")

    def withdraw(self, account_number, amount):
        if account_number in self.accounts:
            if self.accounts[account_number] >= amount:
                self.accounts[account_number] -= amount
                print(f"从账户 {account_number} 取出 {amount} 元。当前余额为 {self.accounts[account_number]} 元。")
            else:
                print("余额不足,无法完成取款。")
        else:
            print("该账户不存在.")

    def show_menu(self):
        print("===== ATM菜单 =====")
        print("1. 创建账户")
        print("2. 查询余额")
        print("3. 存款")
        print("4. 取款")
        print("0. 退出")

    def run(self):
        while True:
            self.show_menu()
            choice = input("请输入选项数字:")

            if choice == "1":
                account_number = input("请输入账户号码:")
                initial_balance = float(input("请输入初始余额:"))
                self.create_account(account_number, initial_balance)

            elif choice == "2":
                account_number = input("请输入账户号码:")
                balance = self.check_balance(account_number)
                if balance is not None:
                    print(f"账户 {account_number} 的余额为 {balance} 元。")

            elif choice == "3":
                account_number = input("请输入账户号码:")
                amount = float(input("请输入存款金额:"))
                self.deposit(account_number, amount)

            elif choice == "4":
                account_number = input("请输入账户号码:")
                amount = float(input("请输入取款金额:"))
                self.withdraw(account_number, amount)

            elif choice == "0":
                print("感谢使用ATM,再见!")
                break

            else:
                print("无效选项,请重新输入。")

# 实例化ATM对象并运行
atm = ATM()
atm.run()

第三个版本 atm_v3.py

增加了历史记录存储

增加一个list变量 self.history,用来存储操作记录
class ATM:
    def __init__(self):
        self.accounts = {}
        self.history = []

    def create_account(self, account_number, initial_balance):
        if account_number not in self.accounts:
            self.accounts[account_number] = initial_balance
            self.history.append(f"创建账户 {account_number},初始余额为 {initial_balance} 元。")
            print(f"账户 {account_number} 创建成功,初始余额为 {initial_balance} 元。")
        else:
            print("该账户已存在。")

    def check_balance(self, account_number):
        if account_number in self.accounts:
            return self.accounts[account_number]
        else:
            print("该账户不存在。")
            return None

    def deposit(self, account_number, amount):
        if account_number in self.accounts:
            self.accounts[account_number] += amount
            self.history.append(f"向账户 {account_number} 存入 {amount} 元。当前余额为 {self.accounts[account_number]} 元。")
            print(f"向账户 {account_number} 存入 {amount} 元。当前余额为 {self.accounts[account_number]} 元。")
        else:
            print("该账户不存在。")

    def withdraw(self, account_number, amount):
        if account_number in self.accounts:
            if self.accounts[account_number] >= amount:
                self.accounts[account_number] -= amount
                self.history.append(f"从账户 {account_number} 取出 {amount} 元。当前余额为 {self.accounts[account_number]} 元。")
                print(f"从账户 {account_number} 取出 {amount} 元。当前余额为 {self.accounts[account_number]} 元。")
            else:
                print("余额不足,无法完成取款。")
        else:
            print("该账户不存在.")
    def show_history(self):
        print("===== 操作历史记录 =====")
        for entry in self.history:
            print(entry)
        print("======================")
    
    def show_menu(self):
        print("===== ATM菜单 =====")
        print("1. 创建账户")
        print("2. 查询余额")
        print("3. 存款")
        print("4. 取款")
        print("5. 显示操作历史记录")
        print("0. 退出")

    def run(self):
        while True:
            self.show_menu()
            choice = input("请输入选项数字:")

            if choice == "1":
                account_number = input("请输入账户号码:")
                initial_balance = float(input("请输入初始余额:"))
                self.create_account(account_number, initial_balance)

            elif choice == "2":
                account_number = input("请输入账户号码:")
                balance = self.check_balance(account_number)
                if balance is not None:
                    print(f"账户 {account_number} 的余额为 {balance} 元。")

            elif choice == "3":
                account_number = input("请输入账户号码:")
                amount = float(input("请输入存款金额:"))
                self.deposit(account_number, amount)

            elif choice == "4":
                account_number = input("请输入账户号码:")
                amount = float(input("请输入取款金额:"))
                self.withdraw(account_number, amount)
            
            elif choice == "5":
                self.show_history()

            elif choice == "0":
                print("感谢使用ATM,再见!")
                break

            else:
                print("无效选项,请重新输入。")

# 实例化ATM对象并运行
atm = ATM()
atm.run()

第四个版本atm_v4.py

每个用户的历史记录单独存储
每个用户保存自己的历史记录,可以学习如何使用嵌套的数据类型,字典里面嵌套字典
将history变量放入账户变量self.accounts里面,这样每个账户单独保存各自的操作记录

class ATM:
    def __init__(self):
        self.accounts = {}

    def create_account(self, account_number, initial_balance):
        if account_number not in self.accounts:
            self.accounts[account_number] = {
                "balance": initial_balance,
                "history": []
            }
            self.accounts[account_number]["history"].append(f"创建账户,初始余额为 {initial_balance} 元。")
            print(f"账户 {account_number} 创建成功,初始余额为 {initial_balance} 元。")
        else:
            print("该账户已存在。")

    def check_balance(self, account_number):
        if account_number in self.accounts:
            return self.accounts[account_number]["balance"]
        else:
            print("该账户不存在。")
            return None

    def deposit(self, account_number, amount):
        if account_number in self.accounts:
            self.accounts[account_number]["balance"] += amount
            self.accounts[account_number]["history"].append(f"存入 {amount} 元。当前余额为 {self.accounts[account_number]['balance']} 元。")
            print(f"向账户 {account_number} 存入 {amount} 元。当前余额为 {self.accounts[account_number]['balance']} 元。")
        else:
            print("该账户不存在。")

    def withdraw(self, account_number, amount):
        if account_number in self.accounts:
            if self.accounts[account_number]["balance"] >= amount:
                self.accounts[account_number]["balance"] -= amount
                self.accounts[account_number]["history"].append(f"取出 {amount} 元。当前余额为 {self.accounts[account_number]['balance']} 元。")
                print(f"从账户 {account_number} 取出 {amount} 元。当前余额为 {self.accounts[account_number]['balance']} 元。")
            else:
                print("余额不足,无法完成取款。")
        else:
            print("该账户不存在.")

    def show_history(self, account_number):
        if account_number in self.accounts:
            print(f"===== 账户 {account_number} 操作历史记录 =====")
            for entry in self.accounts[account_number]["history"]:
                print(entry)
            print("==============================")
        else:
            print("该账户不存在。")

    def show_menu(self):
        print("[===== ATM菜单 =====]")
        print("1. 创建账户")
        print("2. 查询余额")
        print("3. 存款")
        print("4. 取款")
        print("5. 显示操作历史记录")
        print("0. 退出")

    def run(self):
        while True:
            self.show_menu()
            choice = input("请输入选项数字:")

            if choice == "1":
                account_number = input("请输入账户号码:")
                initial_balance = float(input("请输入初始余额:"))
                self.create_account(account_number, initial_balance)

            elif choice == "2":
                account_number = input("请输入账户号码:")
                balance = self.check_balance(account_number)
                if balance is not None:
                    print(f"账户 {account_number} 的余额为 {balance} 元。")

            elif choice == "3":
                account_number = input("请输入账户号码:")
                amount = float(input("请输入存款金额:"))
                self.deposit(account_number, amount)

            elif choice == "4":
                account_number = input("请输入账户号码:")
                amount = float(input("请输入取款金额:"))
                self.withdraw(account_number, amount)

            elif choice == "5":
                account_number = input("请输入账户号码:")
                self.show_history(account_number)

            elif choice == "0":
                print("感谢使用ATM,再见!")
                break

            else:
                print("无效选项,请重新输入。")

# 实例化ATM对象并运行
atm = ATM()
atm.run()

继续进化...

第五个版本atm_v5.py

使用pickle持久存储数据,将账户信息保存到本地文件里面
pickle的中文资料,百度搜索
import pickle

class ATM:
    def __init__(self):
        self.accounts = {}
        self.load_data()  # 在初始化时加载之前保存的数据

    def create_account(self, account_number, initial_balance):
        if account_number not in self.accounts:
            self.accounts[account_number] = {
                "balance": initial_balance,
                "history": []
            }
            self.accounts[account_number]["history"].append(f"创建账户,初始余额为 {initial_balance} 元。")
            print(f"账户 {account_number} 创建成功,初始余额为 {initial_balance} 元。")
        else:
            print("该账户已存在。")

    def check_balance(self, account_number):
        if account_number in self.accounts:
            return self.accounts[account_number]["balance"]
        else:
            print("该账户不存在。")
            return None

    def deposit(self, account_number, amount):
        if account_number in self.accounts:
            self.accounts[account_number]["balance"] += amount
            self.accounts[account_number]["history"].append(f"存入 {amount} 元。当前余额为 {self.accounts[account_number]['balance']} 元。")
            print(f"向账户 {account_number} 存入 {amount} 元。当前余额为 {self.accounts[account_number]['balance']} 元。")
        else:
            print("该账户不存在。")

    def withdraw(self, account_number, amount):
        if account_number in self.accounts:
            if self.accounts[account_number]["balance"] >= amount:
                self.accounts[account_number]["balance"] -= amount
                self.accounts[account_number]["history"].append(f"取出 {amount} 元。当前余额为 {self.accounts[account_number]['balance']} 元。")
                print(f"从账户 {account_number} 取出 {amount} 元。当前余额为 {self.accounts[account_number]['balance']} 元。")
            else:
                print("余额不足,无法完成取款。")
        else:
            print("该账户不存在.")

    def show_history(self, account_number):
        if account_number in self.accounts:
            print(f"===== 账户 {account_number} 操作历史记录 =====")
            for entry in self.accounts[account_number]["history"]:
                print(entry)
            print("==============================")
        else:
            print("该账户不存在。")

    def show_menu(self):
        print("[===== ATM菜单 =====]")
        print("1. 创建账户")
        print("2. 查询余额")
        print("3. 存款")
        print("4. 取款")
        print("5. 显示操作历史记录")
        print("0. 退出")

    def load_data(self):
        try:
            with open("accounts_data.pickle", "rb") as file:
                self.accounts = pickle.load(file)
        except FileNotFoundError:
            # 如果文件不存在,可以忽略此错误
            pass

    def save_data(self):
        with open("accounts_data.pickle", "wb") as file:
            pickle.dump(self.accounts, file)

    def run(self):
        while True:
            self.show_menu()
            choice = input("请输入选项数字:")

            if choice == "1":
                account_number = input("请输入账户号码:")
                initial_balance = float(input("请输入初始余额:"))
                self.create_account(account_number, initial_balance)

            elif choice == "2":
                account_number = input("请输入账户号码:")
                balance = self.check_balance(account_number)
                if balance is not None:
                    print(f"账户 {account_number} 的余额为 {balance} 元。")

            elif choice == "3":
                account_number = input("请输入账户号码:")
                amount = float(input("请输入存款金额:"))
                self.deposit(account_number, amount)

            elif choice == "4":
                account_number = input("请输入账户号码:")
                amount = float(input("请输入取款金额:"))
                self.withdraw(account_number, amount)

            elif choice == "5":
                account_number = input("请输入账户号码:")
                self.show_history(account_number)

            elif choice == "0":
                self.save_data()  # 在退出前保存数据
                print("感谢使用ATM,再见!")
                break

            else:
                print("无效选项,请重新输入。")

# 实例化ATM对象并运行
atm = ATM()
atm.run()

第六个版本atm_v4.py

使用加密库,对账户信息文件加密
使用cryptography库
如果没有安装,使用下面命令安装一下:pip install cryptography

from cryptography.fernet import Fernet
import pickle
import cryptography
import os
# 生成密钥并保存到文件中
def generate_key():
    # 密钥文件路径
    key_file_path = "secret.key"

    # 检查文件是否存在,存在就不重新生成key
    if os.path.exists(key_file_path) and os.path.isfile(key_file_path):
        return
    key = Fernet.generate_key()
    with open("secret.key", "wb") as key_file:
        key_file.write(key)

# 加载密钥
def load_key():
    return open("secret.key", "rb").read()

# 加密数据
def encrypt_data(data, key):
    f = Fernet(key)
    return f.encrypt(data)

# 解密数据
def decrypt_data(encrypted_data, key):
    f = Fernet(key)
    return f.decrypt(encrypted_data)

class ATM:
    def __init__(self):
        self.accounts = {}
        self.load_data()  # 在初始化时加载之前保存的数据

    def create_account(self, account_number, initial_balance):
        if account_number not in self.accounts:
            self.accounts[account_number] = {
                "balance": initial_balance,
                "history": []
            }
            self.accounts[account_number]["history"].append(f"创建账户,初始余额为 {initial_balance} 元。")
            print(f"账户 {account_number} 创建成功,初始余额为 {initial_balance} 元。")
        else:
            print("该账户已存在。")

    def check_balance(self, account_number):
        if account_number in self.accounts:
            return self.accounts[account_number]["balance"]
        else:
            print("该账户不存在。")
            return None

    def deposit(self, account_number, amount):
        if account_number in self.accounts:
            self.accounts[account_number]["balance"] += amount
            self.accounts[account_number]["history"].append(f"存入 {amount} 元。当前余额为 {self.accounts[account_number]['balance']} 元。")
            print(f"向账户 {account_number} 存入 {amount} 元。当前余额为 {self.accounts[account_number]['balance']} 元。")
        else:
            print("该账户不存在。")

    def withdraw(self, account_number, amount):
        if account_number in self.accounts:
            if self.accounts[account_number]["balance"] >= amount:
                self.accounts[account_number]["balance"] -= amount
                self.accounts[account_number]["history"].append(f"取出 {amount} 元。当前余额为 {self.accounts[account_number]['balance']} 元。")
                print(f"从账户 {account_number} 取出 {amount} 元。当前余额为 {self.accounts[account_number]['balance']} 元。")
            else:
                print("余额不足,无法完成取款。")
        else:
            print("该账户不存在.")

    def show_history(self, account_number):
        if account_number in self.accounts:
            print(f"===== 账户 {account_number} 操作历史记录 =====")
            for entry in self.accounts[account_number]["history"]:
                print(entry)
            print("==============================")
        else:
            print("该账户不存在。")

    def show_menu(self):
        print("[===== ATM菜单 =====]")
        print("1. 创建账户")
        print("2. 查询余额")
        print("3. 存款")
        print("4. 取款")
        print("5. 显示操作历史记录")
        print("0. 退出")

    def load_data(self):
        try:
            key = load_key()
            with open("accounts_data.pickle", "rb") as file:
                encrypted_data = file.read()
                decrypted_data = decrypt_data(encrypted_data, key)
                self.accounts = pickle.loads(decrypted_data)
        except (FileNotFoundError, pickle.UnpicklingError, cryptography.fernet.InvalidToken):
            # 如果文件不存在或解密失败,可以忽略此错误
            print("fail to load data")

    def save_data(self):
        key = load_key()
        data_to_save = pickle.dumps(self.accounts)
        encrypted_data = encrypt_data(data_to_save, key)
        with open("accounts_data.pickle", "wb") as file:
            file.write(encrypted_data)

    def run(self):
        while True:
            self.show_menu()
            choice = input("请输入选项数字:")

            if choice == "1":
                account_number = input("请输入账户号码:")
                initial_balance = float(input("请输入初始余额:"))
                self.create_account(account_number, initial_balance)

            elif choice == "2":
                account_number = input("请输入账户号码:")
                balance = self.check_balance(account_number)
                if balance is not None:
                    print(f"账户 {account_number} 的余额为 {balance} 元。")

            elif choice == "3":
                account_number = input("请输入账户号码:")
                amount = float(input("请输入存款金额:"))
                self.deposit(account_number, amount)

            elif choice == "4":
                account_number = input("请输入账户号码:")
                amount = float(input("请输入取款金额:"))
                self.withdraw(account_number, amount)

            elif choice == "5":
                account_number = input("请输入账户号码:")
                self.show_history(account_number)

            elif choice == "0":
                self.save_data()  # 在退出前保存数据
                print("感谢使用ATM,再见!")
                break

            else:
                print("无效选项,请重新输入。")

# 生成密钥(仅需执行一次)
generate_key()

# 实例化ATM对象并运行
atm = ATM()
atm.run()

运行画面

[===== ATM菜单 =====]
1. 创建账户
2. 查询余额
3. 存款
4. 取款
5. 显示操作历史记录
0. 退出
请输入选项数字:

image_XZsE558j_1688837139931_raw.jpg

Python requests 是一个常用的 HTTP 请求库,可以方便地向网站发送 HTTP 请求,并获取响应结果。requests 模块比 urllib 模块更简洁。

使用 requests 发送 HTTP 请求需要先导入 requests 模块:

import requests

导入后就可以发送 HTTP 请求,使用 requests 提供的方法向指定 URL 发送 HTTP 请求,例如:

# 导入 requests 包
import requests

# 发送请求
x = requests.get('https://www.dazuicheng.com/')

# 返回网页内容
print(x.text)

每次调用 requests 请求之后,会返回一个 response 对象,该对象包含了具体的响应信息,如状态码、响应头、响应内容等:

print(response.status_code)  # 获取响应状态码
print(response.headers)  # 获取响应头
print(response.content)  # 获取响应内容

更多响应信息如下:

属性或方法说明
apparent_encoding编码方式
close()关闭与服务器的连接
content返回响应的内容,以字节为单位
cookies返回一个 CookieJar 对象,包含了从服务器发回的 cookie
elapsed返回一个 timedelta 对象,包含了从发送请求到响应到达之间经过的时间量,可以用于测试响应速度。比如 r.elapsed.microseconds 表示响应到达需要多少微秒。
encoding解码 r.text 的编码方式
headers返回响应头,字典格式
history返回包含请求历史的响应对象列表(url)
is_permanent_redirect如果响应是永久重定向的 url,则返回 True,否则返回 False
is_redirect如果响应被重定向,则返回 True,否则返回 False
iter_content()迭代响应
iter_lines()迭代响应的行
json()返回结果的 JSON 对象 (结果需要以 JSON 格式编写的,否则会引发错误)
links返回响应的解析头链接
next返回重定向链中下一个请求的 PreparedRequest 对象
ok检查 "status_code" 的值,如果小于400,则返回 True,如果不小于 400,则返回 False
raise_for_status()如果发生错误,方法返回一个 HTTPError 对象
reason响应状态的描述,比如 "Not Found" 或 "OK"
request返回请求此响应的请求对象
status_code返回 http 的状态码,比如 404 和 200(200 是 OK,404 是 Not Found)
text返回响应的内容,unicode 类型数据
url返回响应的 URL

实例

# 导入 requests 包
import requests
import json

    
# 发送请求
x = requests.get('https://api.ipify.org?format=json')
    
# 返回 http 的状态码
print(x.status_code)
    
# 响应状态的描述
print(x.reason)
    
# 返回编码
print(x.apparent_encoding)

json_object = json.loads(x.text)
print(f"public IP: {json_object['ip']}")

实时汇率转换小程序

import requests
import time
import json
import datetime
import sys


supported_currency_name = {
    0: '欧元',
    1: '美元',
    2: '日元',
    3: '英镑',
    4: '人民币'
}

supported_currency_code = {
    0: 'EUR',
    1: 'USD',
    2: 'JPY',
    3: 'GBP',
    4: 'CNY'
}

def get_rate(from_currency, to_currency):
    url = 'https://v6.exchangerate-api.com/v6/b3c4901ef11a8bcb17276efc/latest/EUR'
    response = requests.get(url)
    json_object = json.loads(response.text)
    if json_object["result"] == "success":
        from_rate = float(json_object['conversion_rates'][from_currency])
        to_rate = float(json_object['conversion_rates'][to_currency])
        from_to_rate = to_rate / from_rate
        timestamp = int(json_object['time_last_update_unix'])
        query_time = datetime.datetime.fromtimestamp(timestamp)
        return query_time, from_to_rate
    else:
        return 0, 0

print("$$$$$$$$欢迎使用汇率转换程序¥¥¥¥¥¥¥¥¥¥")
print(f"支持的货币代码有:{supported_currency_code}")
from_currency_choice = int(input('输入原始货币编号数字:'))
from_currency_code = supported_currency_code[from_currency_choice]
from_currency_name = supported_currency_name[from_currency_choice]
print(f"你输入的初始货币:{from_currency_name}")
print(f"支持的货币代码有:{supported_currency_code}")
to_currency_choice = int(input('输入目标货币编号数字:'))
to_currency_code   = supported_currency_code[to_currency_choice]
to_currency_name = supported_currency_name[to_currency_choice]
print(f"你输入的目标货币:{to_currency_name}")
source_amount = int(input('输入待转换的货币金额: '))

query_time, rate = get_rate(from_currency_code, to_currency_code)
if query_time == 0 and rate == 0:
    print("获取汇率失败...")
    sys.exit()

target_amount = source_amount * rate

print(f"[{query_time}]: {source_amount} {from_currency_name} 可以换 {target_amount:.2f} {to_currency_name}")


image_rmPjGmaY_1688792209178_raw.jpg

想象一下,你有一个机器人,你希望告诉它在不同的情况下应该做什么。状态机就像是给机器人的一组指示,根据它当前的状态或情况来执行。

这样想一想:机器人可以有不同的状态,就像你可以有不同的心情或处境一样。例如,机器人可以处于“快乐”状态、“伤心”状态或“生气”状态。

现在,假设你希望机器人根据它的状态做不同的事情。如果机器人处于“快乐”状态,你希望它跳舞。如果它处于“伤心”状态,你希望它播放一首悲伤的曲调。如果它处于“生气”状态,你希望它跺脚。

为了实现这个目标,你可以创建一个状态机。它就像是一个流程图,展示了机器人可能的不同状态以及在每个状态下应该执行的操作。

在我们的例子中,状态机可能是这样的:

  • 如果机器人处于“快乐”状态,它应该跳舞。
  • 如果机器人处于“伤心”状态,它应该播放一首悲伤的曲调。
  • 如果机器人处于“生气”状态,它应该跺脚。

所以,每当机器人改变它的状态时,它会检查状态机,并根据当前的状态知道应该采取什么行动。如果它处于“快乐”状态,它会跳舞。如果它处于“伤心”状态,它会播放一首悲伤的曲调。如果它处于“生气”状态,它会跺脚。

状态机不仅仅用在机器人上,还可以用在计算机程序、游戏甚至是交通信号灯中。它们帮助我们组织和控制在不同情况下发生的事情。

交通信号灯

当我们讨论状态机的例子时,一个经典的示例是交通信号灯。让我们使用Python来实现一个简单的交通信号灯状态机:

class TrafficLight:
    def __init__(self):
        self.current_state = 'red'
    
    def change_state(self):
        if self.current_state == 'red':
            print("红灯,停车")
            self.current_state = 'green'
        elif self.current_state == 'green':
            print("绿灯,行走")
            self.current_state = 'yellow'
        elif self.current_state == 'yellow':
            print("黄灯,请准备停车")
            self.current_state = 'red'
        else:
            print("无效状态")
            
# 创建交通信号灯状态机
traffic_light = TrafficLight()

# 模拟信号灯状态变化
traffic_light.change_state()  # 输出:红灯,停车
traffic_light.change_state()  # 输出:绿灯,行走
traffic_light.change_state()  # 输出:黄灯,请准备停车
traffic_light.change_state()  # 输出:红灯,停车

增加等待时间

为了更加真实模拟现实交通灯,需要在信号灯转换之间增加等待时间,使用time.sleep

import time

在状态转换之前等待特定时间:

time.sleep(2)  # 停留2秒

增加打印提示

使用循环打印

  • 等待时间,秒为单位
    def print_delay(self, seconds):

      for second in range(seconds):
          self.print_delay_second(1)
    
  • 一秒打印一个等待提示...
    def print_delay_second(self, second=1):

      start_time = time.time()
      while time.time() - start_time < second:
          pass    
      print("waiting...")
    

状态机涉及的一些概念:

  • 状态
  • 转换
  • 输入
  • 输出

python里面有很多现成的实现好的状态机框架

体验一个简单的实现fysom

安装

pip install fysom

一个简单的例子:
finite-state-machine.jpg

from fysom import *

fsm = Fysom({'initial': 'awake',
             'final': 'red',
             'events': [
                 {'name': 'wakeup', 'src': 'sleeping', 'dst': 'awake'},
                 {'name': 'sleep',  'src': 'awake',   'dst': 'sleeping'}]})

print(fsm.current)   # awake
fsm.sleep()
print(fsm.current)   # sleeping
fsm.wakeup()
print(fsm.current)   # awake

拓展,练习

使用fsom模拟交通灯?,参考如下:
from fysom import Fysom
import time

def on_green_light():
    print("绿灯")
    time.sleep(5)
    fsm.trigger('change')  # 绿灯持续5秒后触发状态转换到下一个状态

def on_yellow_light():
    print("黄灯")
    time.sleep(2)
    fsm.trigger('change')  # 黄灯持续2秒后触发状态转换到下一个状态

def on_red_light():
    print("红灯")
    time.sleep(5)
    fsm.trigger('change')  # 红灯持续5秒后触发状态转换到下一个状态

fsm = Fysom({'initial': 'green',
             'events': [{'name': 'change', 'src': 'green', 'dst': 'yellow'},
                        {'name': 'change', 'src': 'yellow', 'dst': 'red'},
                        {'name': 'change', 'src': 'red', 'dst': 'green'}],
             'callbacks': {'on_green': on_green_light,
                           'on_yellow': on_yellow_light,
                           'on_red': on_red_light}})

while True:
    fsm.onchange()  # 执行状态转换
    time.sleep(1)  # 在状态转换之间添加1秒的延时等待